Showing posts with label Dungeon. Show all posts

Thursday, December 29, 2022

Rift Dungeons: Foul Cascade


The Foul Cascade is a dungeon located in the Scarlet Gorge region of the MMO game Rift. This dungeon is home to a variety of fearsome foes and challenging bosses, making it a popular destination for players looking to test their skills and earn valuable loot.

In standard mode, players will encounter enemies ranging from level 30 to 32, as well as four bosses: Maelforge, the Bonemonger, the Foul Cascade, and Thex. Maelforge is a powerful dragon who wields devastating fire spells and can call upon his minions to assist him in battle. The Bonemonger is a massive skeleton that wields a giant hammer and has the ability to heal itself, making it a formidable opponent. The Foul Cascade is a giant serpent that can poison and entangle its foes, while Thex is a powerful demon who wields dark magic and can summon minions to do his bidding.

In expert mode, the difficulty increases significantly, with enemies ranging from level 52 to 54 and six bosses to contend with. In addition to the four bosses from standard mode, expert mode players will also face off against the fearsome demon lord Zareph and the stone golem Quorvok. Zareph is a powerful spellcaster who can unleash devastating magic attacks and summon minions to his aid, while Quorvok is a massive golem that can crush its foes with its massive fists.


To access the Foul Cascade, players can travel to the Scarlet Gorge region and head towards the top of the Riverfell cliff face, where they will find the entrance to the dungeon at /setwaypoint 3702 2685. It is recommended that players bring a well-balanced group of characters with a variety of skills and abilities, as the foes and bosses within the Foul Cascade will require a diverse range of strategies to defeat.

Players who successfully navigate the Foul Cascade will be rewarded with valuable loot, including gear, materials, and currency. In addition, completing the dungeon will grant players notoriety with the Quarry Rats faction, which can unlock additional rewards and perks.

Overall, the Foul Cascade is a challenging and rewarding dungeon that offers a true test of skill for players of all levels. Whether you're a seasoned veteran looking for a new challenge or a newcomer to the game looking to hone your skills, the Foul Cascade is sure to provide an exciting and rewarding experience.


Read rest of entry

Sunday, December 18, 2022

Rift Dungeons: Shugo Emperor's Tomb


Deepstrike Mines is a dungeon located in the Planes of Telara, the world of the popular MMORPG RIFT. It is a challenging, multi-level dungeon that requires a group of skilled players to navigate and defeat the powerful bosses within.

The Deepstrike Mines are located in the Iron Pine Peaks zone, a frozen tundra inhabited by dwarves and other fearsome creatures. The mines themselves were once used by the dwarves to extract valuable resources, but they have since been abandoned and taken over by various hostile forces.

Players can enter the Deepstrike Mines at level 50, and it is recommended that they have a group of at least 4 players to tackle the dungeon. The dungeon consists of three main levels, each with its own set of bosses and challenges.

The first level of the Deepstrike Mines is called the Upper Depths. It is here that players will face off against the first boss, Orecrusher. Orecrusher is a giant golem created by the dwarves to help with the mining efforts, but it has been corrupted by the Plane of Earth and now serves as a guardian of the mines.

The second level of the Deepstrike Mines is called the Lower Depths. This level is home to the second boss, the Deepstrike Elementalist. The Deepstrike Elementalist is a powerful mage who has mastered the elements and uses them to defend the mines.

The final level of the Deepstrike Mines is called the Core. It is here that players will face off against the final boss, the Deepstrike Avatar. The Deepstrike Avatar is a powerful being created by the Plane of Earth to defend the mines and is not to be underestimated.

Defeating the bosses in the Deepstrike Mines will reward players with valuable loot, including rare gear and crafting materials. The dungeon is also a great source of experience points, making it a popular choice for players looking to level up their character.

Overall, the Deepstrike Mines is a challenging but rewarding dungeon for players in RIFT. It requires a skilled group of players to navigate and conquer, but the rewards make it worth the effort. If you're looking for a tough but rewarding dungeon experience, the Deepstrike Mines is definitely worth checking out.


Read rest of entry

Wednesday, December 14, 2022

Rift Dungeons: Iron Tomb


Iron Tomb is a dungeon located in the Plane of Earth in the popular MMORPG, RIFT. This dungeon is a medium-level challenge, suitable for players with a gear score of around 400-450.

Iron Tomb is an ancient dwarven stronghold that was once used to defend the Plane of Earth from invaders. However, it has since been taken over by the earth elemental, Khorgath Bladefist, and his army of elementals and constructs.

As players enter the dungeon, they are immediately confronted by Khorgath's minions, who will put up a formidable fight. The first boss of Iron Tomb is the earth elemental, Dargrokk, who is protected by a group of constructs. Players will need to take out the constructs first before focusing on Dargrokk, who has a variety of powerful earth-based abilities.

The next area of the dungeon is the Forge of Khorgath, where players will face off against the fire elemental, Vorag the Destroyer. This boss has a number of fiery abilities that can easily overwhelm unprepared players, so it's important to have a well-coordinated group to take him down.

The final area of Iron Tomb is the Throne of Khorgath, where players will face off against the powerful earth elemental himself. Khorgath is a formidable opponent, with powerful earth-based abilities and a massive health pool. Players will need to utilize a variety of strategies and abilities to take him down, including interrupting his abilities and focusing on his weaknesses.

Defeating Khorgath will not only provide players with valuable loot and gear, but also the satisfaction of conquering a challenging dungeon. However, it's important to note that Iron Tomb can be a difficult dungeon, even for experienced players, so it's important to come prepared with a well-coordinated group and a good understanding of the dungeon's mechanics.

Overall, Iron Tomb is a thrilling and challenging dungeon that offers players a unique experience in the Plane of Earth. With its challenging bosses and valuable rewards, it's a must-do for any player looking to test their skills and take on a challenging dungeon in RIFT.


Read rest of entry

Monday, March 12, 2012

Rift Dungeons - Iron Tombs

Empowered by Regulos, Alsbeth is perhaps Telara’s most powerful sorceress, but even she has yet to break the will of Eliam. His spirit alone has withstood her magic, so she has recruited Ragnoth, a Fire demon adept at enslaving souls. For all this, Eliam’s ghost calls Ascended to Iron Tomb, warning all who will listen that the fate of Telara may be decided in his crypt under Freemarch.

The Endless have not come to Iron Tomb simply because they can’t abide a dignified death, or even for an army of enthralled heroes. The March Wardens were buried where the righteous might of their ghosts could protect an ancient secret. Tales say that deep below Iron Tomb itself lie mossy caves, lit by the hideous glow of an artifact that could bring victory to the Endless Court, and ruin to all Telara.

Iron Tombs

Iron Tombs is located in the Defiant starting area of Freemarch. This dungeon is meant for levels 19+. There are a total of five quests for this zone, all of them are given inside. The first quest is the standard automatic quest you receive for entering which is also automatic. There are two more additional quest given by Eliam’s Ghost at the entrance. Two other quests are given deeper in the dungeon by Tobias Leighton and Davian Crow.

Quest Information
Release the March Wardens
Quest Giver: Automatic
Location: Dungeon Entrance
Objective: Defeat all boss mobs in Iron Tombs; Caor Ashstone, The Three Kings, Ragnoth the Despoiler


The souls of ancient March Wardens have been corrupted by the Endless Court. Release them from their torment and then destroy Ragnoth the Despoiler so he does not reimprison them.


Relics of the March Warden
Quest Giver: Eliam’s Ghost
Location: Dungeon Entrance
Objective: Collect Staff of Derribec, Horn of Humbart, Targe of Laric. All obtained from the Three Kings boss event.


The March Wardens were buried with items of power they used in life and are now a part of the ritual that binds them to the Endless Court. Though they still carry them, it is as if they are carrying their own leashes. We need those back as well in order to free them.


Source of the Control
Quest Giver: Eliam’s Ghost
Location: Dungeon Entrance
Objective: Find the Sourcestone Amulets (see map above)


Yes, that villain Alsbeth, pawn of Regulos, is here, and she has corrupted many of the other March Wardens as her thralls. They are a powerful weapon in her hands. She has taken powerful sourcestone amulets they were buried with and corrupted them. As long as they are in her possession, the March Wardens are under her control.

If we could get them back, we could break her hold. Get them out of here and take them back to Sanctum where they will be safe.

You Are Who They Call
Quest Giver: Davian Crow
Location: See Map Above
Objective: Drag Spectral Screamers into Spectral Traps (See map above)


Alsbeth has corrupted three of Freemarch’s greatest kings. Those kings are a part of a spectral lock, used to contain foul spirits that once plagued our kingdom. Destroying these ancient monarchs will break the lock and release that horror once more. Yet, we cannot let Alsbeth maintain her hold over these fallen lords, so I must ask a great service of you.

After defeating the three kings, prevent the spirits from escaping by sealing them back in their eternal prison.

Laid to Rest
Quest Giver: Tobias Leighton
Location: See Map Above
Objective: Destroy the Death Shards


Alsbeth seeks to corrupt all the undead within the Iron Tomb for Regulos’ army. She’s place Death Shards throughout the tomb that twist our will.
I can reveal the spirits which feed these dark altars, but I need a hero to destroy Alsbeth’s creations.

Iron Tombs: Undead Dungeon Crawl
Iron Tombs is a pretty short instance since it contains only three bosses however it will be time consuming due to a lot of trash packs. It is a pretty standard dungeon crawl, there are no tricks, and it’s impossible to get lost. Being a level 19 dungeon you can almost bring any group configuration, even a Mage Healer, a Chloromancer. Rogues and Clerics can also tank this instance if everyone works well together.

The first thing you should do upon entering the instance is pick up two quests from Eliam’s Ghost. You can’t miss the quest giver since you’ll watch him talk to Alsbeth. Once that’s done it’s only a short walk to the first boss. Clear through a few packs of trash and you’ll come to a large open area. There is a ramp along the wall to your right. Walk up and you’ll have a few packs of ghosts to clear. Watch your pulls as the first boss, Caor Ashstone, wanders a short path around the center of this balcony. Clear a good space and get ready to engage the first boss.

Caor Ashstone
Caor Ashstone is a pretty simple boss, but can become healing intensive. He casts a quick ticking dot called Ashstone’s Curse that does low damage and he also puts the an effect called Jagged Wounds on the tank. This caveat is that this effect can stack and if it builds up it will wipe the group. Keep those heals on the target, and burn down the boss.


Once you are finished you want to continue west along the balcony and down another ramp. Once you come down the ramp you’ll have the option of clearing more trash to your right to get to Davian Crow who gives you the quest “You Are Who They Call” which you can complete after defeating the second boss encounter. It will offer you extra experience and a green necklace. In any case, you will continue forward and make a left up some stairs. If you’re careful you can skip at least one pack of trash mobs here.

Once you go up and then down the other side you’ll trigger the second boss event called the Three Kings. At first you’ll see Alsbeth begin speaking as she summons the Three Kings. Don’t worry about setting off the event, it will only start once you get close to Humbart, who is a decent distance away.


The Three Kings
The Three Kings consists of three bosses; Humbart the Bold, Laric the Ascendant and Derribec the Magus. Each one has a special ability that you have to pay attention too. Humbart has a frontal cleave called Deathly Whirlwind and a Knockback ability. You can tank him with your back against his statue. Derribec has a Life Rend which is a single target nuke. Laric has a heal spell called Unholy Mending which should be interrupted if possible.

The fight starts off with only Humbart. Once he’s dead Derribec appears on the right, and once dead, Laric appears on the left. If you are having a tough time, or are underleveled, you can always reset after each boss goes down. They will not aggro automatically. After all three are dead, they all respawn at the same time and attack you. The kill order should be Laric, Derribec and then Humbart.

Once all three are dead, a treasure chest appears with loot.


If you had picked up the quest from Davian Crow you will notice a large light glowing at the base of the platform the bosses spawned on. This is the Spectral Lure that you will use for the quest “You Are Who They Call“. Once you the Three Kings are defeated Spectral Screamers would of spawned all around you. Simply run over to them, click on the object you received for this quest, and run back to the lure. Do this ten times and that’s it.


Once you are finished it’s time to continue on. So far it’s been a quick journey to the second boss, but now comes a few long hallways of trash mobs, and hard hitting ones at that. Head north into the hallway and once through the door you’ll notice the last quest giver, Tobias Leighton, on your right. Pick up his quest as you’ll be passing by the three Death Shards on your way.

Continue up the stairs and at the top you’ll see two new mobs. These guys hit hard and cleave, so be very careful about your positioning. In the room at the top of the stairs you’ll see the first of three Death Shards, they are fairly obvious looking.

The Death Shard needs to be destroyed and in order to do so you have to kill three mobs that are protecting it. They are easily seen because they are the ones with giant lights beams coming out of their hands attached to the shard. Once they are dead you are free to destroy the Death Shard, however, make sure you clear a large space around it since the shard will summon many Putrid Ravagers. Go at a slow pace so you don’t get overwhelmed.


Continue through the hallway clearing trash. Once you turn the corner and start heading south again you’ll see the second Death Shard. Defeat that and continue on. At the end of the hallway you’ll see Alsbeth again, don’t worry she won’t attack you, she’ll run through a script and disappear, taunting you.

This next room is quite interesting. If you look down you’ll see dozens of black shade like mobs roaming around. Directly below you on the balcony is another room. In this room are the Sourcestone Amulets for the quest.


Head down the either side, it doesn’t matter, and come head out into the floor. You’ll notice there are orbs on pedestals spread out. These things will help you clear out all of the trash. If one person stands close by to them they will light up and do AOE damage to all of the shades around it. So keep your group moving from orb to orb clearing out all the mobs. One thing to consider, these mobs will continuously respawn until they are all dead, so move fast. 

Once you get to the middle of the area, turn north-east and you’ll see a small room. Head in and in the back of it you’ll notice a small chest on the floor. It’s hard to see and most people will likely miss it. Open it up and loot your Sourcestone Amulets to complete the quest.


Turn around and head south-west into another room. You’ll see two exits, one to the south and the west. Both go to the same spot, but the one to the west contains the last Death Shard. Head up, defeat the Shard and continue up the stair until you see the final boss.

Ragnoth the Despoiler

This is the last boss of the instance and it’s not a spank and tank. It requires movement of everyone in the group. Ragnoth has three attacks; Gout of Flame, which is a single target DD spell, Chaotic Flame which is a PBAOE (frontal cleave) spell, and lastly Flame of Ragnoth. If you get hit with Flame of Ragnoth, you will most likely wipe. It’s an AOE attack spell that applies a DOT to everyone that is nearly impossible to heal through unless you are over geared for the instance. However there is a way to avoid it.


At the start of the fight he is facing an altar. The tank should head in and grab aggro and manuever Ragnoth to face away from the party so the cleave doesn’t hit anyone else. At this point it’s a simple tank and spank. As we have mentioned though, Ragnoth will periodically cast Flame of Ragnoth. Fortunately for us, Eliam’s Ghost is here to save us.

Be very aware of your surroundings. As Ragnoth begins his cast, Eliam’s Ghost will arrive at one of a few random location near the decorative idols periodically surrounding the dais. Run into the light and you will not be affected by the Flame. However Ragnoth will follow you over so the tank must be careful to back up and not turn around so he or she does not gain exposure.

Repeat this cycle and you will win your loot and the dungeon. Once he’s death Eliam’s Ghost will appear and open a portal out of the dungeon for you.


Iron Tombs Dungeon Guide Video
Read rest of entry

Friday, February 18, 2011

Runic Descent bosses


Instance in RIFT named Runic Descent located in Moonshade.


I know most people have lives, and won't see this content in the beta. I'll get a Fall of Lantern Hook video up soon as I find a group lol.


Runic Descent Achievements

PointsTitleDescription
30Conqueror: Runic DescentComplete All of the Runic Descent Achievements Listed Below.
10Runic DescentDefeat all of the bosses in Runic Descent.
15Expert: Runic DescentDefeat the bosses of Runic Descent on Expert difficulty level.
15Rapid Assault: Runic DescentDefeat all Runic Descent Bosses on Expert Difficulty within 40 minutes of first combat.
15Achiever: Runic DescentComplete all Runic Descent achievements listed below.
10Keep CleaningDefeat Rictus without any party member taking every tick of damage of Rotting Flesh on Expert difficulty.
10Blossom BombsDefeat Wormwood without any party member taking any damage from a Rotting Blossom on Expert difficulty.
10RestraintDefeat Warden Falidor without any party member damaging the boss while his Glacial Shield is active on Expert difficulty.
10Mourning SongDefeat Atrophinius the Fallen without killing any Eternal Lackeys on Expert difficulty.
10Blinding LightDefeat Eliam the Corrupted without any player becoming affected by Blinding Darkness on Expert difficulty.
10Avoiding Death's GraspDefeat Eliam the Corrupted without any player being affected by Torment on Expert difficulty.
Read rest of entry

Monday, February 14, 2011

A Hands-On Look at a Rift Endgame Dungeon: Abyssal Precipice


Flying in the face of concerns about World of Rift and a number of media sites and fansites to their Redwood City digs to check out a chunk of Rift’s 40-50 experience. The bulk of our time was spent in Abyssal Precipice - a group-only progression dungeon for high level (45-50) players.

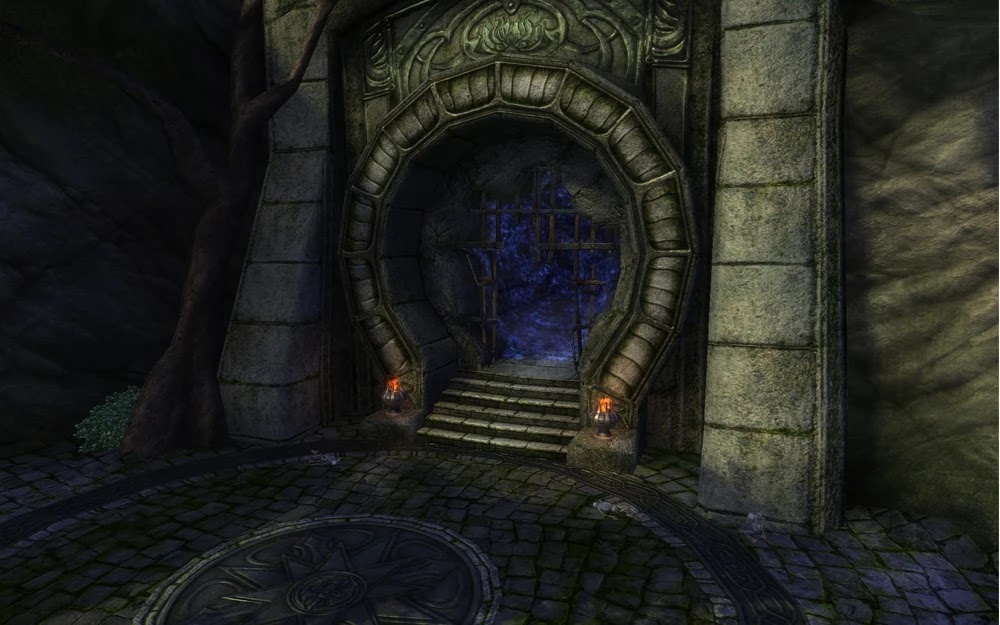
Abyssal Precipice is a repeatable coda for the ominous, skeleton-ridden adagio that is Ironpine, one of three overland zones beta players won't see before launch. Like all Rift zones and dungeons, it somehow manages to combine thick contrasty hues and raw beauty, otherworldly danger, and more than a hint of the familiar. Beta players that enjoyed the last stage of the Realm of the Fae will find a similar hibernal mode in Abyssal Precipice, if not the signature mess-with-visibility-to-heighten-suspense that defines that final encounter. Blues, purples, and winter twilit oranges color the craggy landscape, and snow speckles the air - the “dungeon” mostly occurs outdoors, with a few ice cave interludes. The zone is riddled with Defiant cultist baddies throughout, their telltale sourcestone generators littering the landscape.

Storywise, your group is trying to stop the cultists from freeing a powerful water dragon locked deep within Abyssal Precipice. Check out this flythrough video for a closer look at Abyssal Precipice's backstory:


Design-wise, Abyssal Precipice is a fairly linear showpiece of Rift’s 5-man dungeons, but it never quite feels linear. The path spirals upward, across spans, through caverns; often catching a glimpse of what lies ahead on the opposing cliff face.

Into the Abyss
The unlikely team of writers from TTH, Curse, Beckett’s Massively Online Gamer, Zam, and MMORPG.com took on the Abyssal Precipice, though we were generally low on Rift experience and found ourselves holding the reins of well equipped, but totally unfamiliar, level 50 characters. Worse, Trion devs like to use these moments as their own game testing aquarium – they weren’t sharing any advice. We were on our own, with only our general knowledge of how dungeons and boss fights work to aid us.

I manned up as the tank of the group - a Dwarven warrior – and settled into a rough mix of Paladin, Champion, and Paragon. I made a few minor tweaks to my soul tree, taking points out of Paragon and swapping in some Paladin, opting for defense over damage. Not much later I realized that such well-intentioned changes were a mistake.

The first few battles, needless to say, went poorly. I mistimed a pull on a nasty roaming ice elemental and pulled a group of cultist archers and fighters. That was a wipe. Our healer raised a complaint about the spell icons for heals being unintuitive, and someone suggested she look for the golden hued explosions. That helped, and on our second go we pulled only the Kelari group and still wiped, but slower. After a quick inventory of buffs and DoTs, we found new and exciting ways to augment our base stats and scratch damage off of our opponents. I finally settled into a taunt rotation that seemed to keep the focus on me, reversed some of my paragon soul tree abilities to up my damage and keep the hate, and at long last, we steamrolled the first few groups of enemies.

Just when we thought we had things figured out, I stumbled across swarms of scarab-like creatures that spawned out of nowhere. These were never a serious threat on their own, but twice spawned at inopportune times, as when the group was in mid-pull of an enemy group. It was a nice touch of challenge for when we’d just begun to find our rhythm.

Abyssal Precipice Boss Fights
You might want to skip this section if you hate spoilers. The overarching repeatable quest – King of the Mountain – required us to find and kill three major bosses. Soon enough we encountered the first, Kaler Andrenos.

Kaler was a tough fight, especially for our ragtag crew. His nastiest attack was a line of sight insta-death attack, but fortunately this spell had a five second cast, which allowed more than enough time to duck behind a nearby pillar. Kaler’s other nasty attack dropped fiery rings of damage-over-time death on his target. Fortunately, he also knocked tanks and meleers out of the circle when he casted this particular spell. The impulse when knocked back is to charge back into combat, but Kaler had me thinking twice. He also has a lofty amount of hitpoints.

Three wipes later, Kaler was down and we were on our way up our bluff to an optional encounter. A gigantic sword was sunk into the earth and we figured the thing to do was to click on it. An ominous voice said something about Theodor’s test, and we were plunged into a ring battle against waves of skeletons. Archer skeletons, warrior skeletons, and at the end, a bloated abomination-like creature with a ton of hitpoints (this seems to be a theme) named Durak. Unfortunately, Durak wasn’t on the hit list, but he did drop a decent necklace too low to be of use to our admittedly twinked characters.

A few encounters later, past some more riptides, ice goblin and ice ogre sorts, we came to the Matterhorn of our Rift endgame experience. His (or it’s) name was Majolic. Everything started out so nicely – Majolic, in his human form, was pretty squishy and his hitpoints evaporated quickly. Then Maj went and invoked his blood deity. Things quickly got out of hand - Majolic the Bloodcaller turned out to be an anti-group missile.

In the five complete routs that followed and despite furiously scanning the combat logs, we figured out three things. One, the direct approach leads directly to a wipe – there’s just way too many hitpoints for a full frontal damn-the-torpedoes-and-scripted-behaviors assault. Two, if Majolic calls your name, you’ll be encased in a nasty 7,000 hitpoint blood crystal that quickly saps your life via a DoT spell called infected blood. Infected blood deals water damage, so maybe fire is the Three, if your group doesn’t free you, or if your healer winds up first on his shit list, your group will tumble like dominoes. In the end, our Abyssal Precipice ended the only way it could – with a lunch break.

Falling Off the Precipice
Producer Hal Hanlin warned us beforehand: this particular dungeon had caused a number of wipes among the devs a day before. Nonetheless, Majolic will haunt me until some bright day when I can face him with a stalwart group post-launch. Until then, I’m left with the impression that endgame in Rift is no joke, and will leave the toughest of players with plenty of challenge long after launch.

So, our endgame experience in a nutshell: a group of veteran MMO media types couldn’t complete a progression-level endgame dungeon in three hour playsession, and there are two tiers of expert-level dungeons above AP before players can even get access to the first of three planned raids (one will be in at launch). Creative Director Scott Hartsman also pointed out that raids and dungeons were only roughly 50% of endgame content, the rest being split among open PvP, endgame invasions, and warfronts. If, in Scott’s words, there was a tacit challenge to name another MMORPG that launched with this kind of endgame content in absolute evidence, I couldn’t.

And if Abyssal Precipice is a solid example of Rift's endgame dungeons, naysayers might do better to criticize Rift’s endgame on the basis of too much challenge, rather than not enough.
Read rest of entry
 

Star Wars Gaming news

RIFT: News and guides © 2009