Showing posts with label instance. Show all posts

Sunday, December 18, 2022

Rift Dungeons: Shugo Emperor's Tomb


Deepstrike Mines is a dungeon located in the Planes of Telara, the world of the popular MMORPG RIFT. It is a challenging, multi-level dungeon that requires a group of skilled players to navigate and defeat the powerful bosses within.

The Deepstrike Mines are located in the Iron Pine Peaks zone, a frozen tundra inhabited by dwarves and other fearsome creatures. The mines themselves were once used by the dwarves to extract valuable resources, but they have since been abandoned and taken over by various hostile forces.

Players can enter the Deepstrike Mines at level 50, and it is recommended that they have a group of at least 4 players to tackle the dungeon. The dungeon consists of three main levels, each with its own set of bosses and challenges.

The first level of the Deepstrike Mines is called the Upper Depths. It is here that players will face off against the first boss, Orecrusher. Orecrusher is a giant golem created by the dwarves to help with the mining efforts, but it has been corrupted by the Plane of Earth and now serves as a guardian of the mines.

The second level of the Deepstrike Mines is called the Lower Depths. This level is home to the second boss, the Deepstrike Elementalist. The Deepstrike Elementalist is a powerful mage who has mastered the elements and uses them to defend the mines.

The final level of the Deepstrike Mines is called the Core. It is here that players will face off against the final boss, the Deepstrike Avatar. The Deepstrike Avatar is a powerful being created by the Plane of Earth to defend the mines and is not to be underestimated.

Defeating the bosses in the Deepstrike Mines will reward players with valuable loot, including rare gear and crafting materials. The dungeon is also a great source of experience points, making it a popular choice for players looking to level up their character.

Overall, the Deepstrike Mines is a challenging but rewarding dungeon for players in RIFT. It requires a skilled group of players to navigate and conquer, but the rewards make it worth the effort. If you're looking for a tough but rewarding dungeon experience, the Deepstrike Mines is definitely worth checking out.


Read rest of entry

Thursday, December 15, 2022

Rift Dungeons: Darkening Deeps

Darkening Deeps is a dynamic event in the game RIFT that takes place in the realm of Iron Pine Peak. This challenging instance is meant for players at level 50, who are looking for a unique and engaging experience.

The story behind Darkening Deeps revolves around a group of dwarves who have been trapped underground by an evil force. The player must venture into the depths of the earth to rescue the dwarves and put an end to the darkness that has taken hold of the mines.

The instance is filled with various enemies, including powerful bosses and unique creatures. Players must navigate their way through tight tunnels and treacherous underground environments, while fighting off waves of enemies. The instance also features puzzles and challenges that must be solved in order to progress.

One of the standout features of Darkening Deeps is the wide variety of rewards that can be obtained. In addition to standard loot, players can earn special achievements and titles for completing various tasks within the instance.

Overall, Darkening Deeps is a thrilling and rewarding instance that offers players a unique and exciting experience within the world of RIFT. It is a must-play for fans of the game and a great challenge for those looking to take on some of the game's toughest content.


Read rest of entry

Wednesday, December 14, 2022

Rift Dungeons: Iron Tomb


Iron Tomb is a dungeon located in the Plane of Earth in the popular MMORPG, RIFT. This dungeon is a medium-level challenge, suitable for players with a gear score of around 400-450.

Iron Tomb is an ancient dwarven stronghold that was once used to defend the Plane of Earth from invaders. However, it has since been taken over by the earth elemental, Khorgath Bladefist, and his army of elementals and constructs.

As players enter the dungeon, they are immediately confronted by Khorgath's minions, who will put up a formidable fight. The first boss of Iron Tomb is the earth elemental, Dargrokk, who is protected by a group of constructs. Players will need to take out the constructs first before focusing on Dargrokk, who has a variety of powerful earth-based abilities.

The next area of the dungeon is the Forge of Khorgath, where players will face off against the fire elemental, Vorag the Destroyer. This boss has a number of fiery abilities that can easily overwhelm unprepared players, so it's important to have a well-coordinated group to take him down.

The final area of Iron Tomb is the Throne of Khorgath, where players will face off against the powerful earth elemental himself. Khorgath is a formidable opponent, with powerful earth-based abilities and a massive health pool. Players will need to utilize a variety of strategies and abilities to take him down, including interrupting his abilities and focusing on his weaknesses.

Defeating Khorgath will not only provide players with valuable loot and gear, but also the satisfaction of conquering a challenging dungeon. However, it's important to note that Iron Tomb can be a difficult dungeon, even for experienced players, so it's important to come prepared with a well-coordinated group and a good understanding of the dungeon's mechanics.

Overall, Iron Tomb is a thrilling and challenging dungeon that offers players a unique experience in the Plane of Earth. With its challenging bosses and valuable rewards, it's a must-do for any player looking to test their skills and take on a challenging dungeon in RIFT.


Read rest of entry

Monday, December 12, 2022

Rift Dungeons: Realm of the Fae


Once upon a time, in a magical world known as Telara, there was a realm called the Realm of the Fae. This realm was inhabited by a group of mystical beings known as the Fae, who were known for their incredible beauty and otherworldly powers.

The Fae were ruled by a powerful queen known as Queen Theia, who was said to be the most beautiful and wise of all the Fae. Under her guidance, the Realm of the Fae flourished and prospered, with the Fae living in harmony with one another and the rest of the inhabitants of Telara.


But as time passed, a dark force began to stir within the realm. A group of rogue Fae, led by a wicked Fae known as Prince Dagon, plotted to overthrow Queen Theia and take control of the Realm of the Fae for themselves.

As the rebellion grew stronger, Queen Theia knew that she had to act quickly in order to protect her realm and her people. She called upon the greatest warriors of the Fae to join her in a battle against Prince Dagon and his followers.

The battle was long and fierce, with both sides suffering heavy losses. But in the end, Queen Theia and her warriors were victorious, and Prince Dagon and his rebels were defeated and banished from the realm.

With the threat of rebellion vanquished, Queen Theia was able to focus on rebuilding the Realm of the Fae and ensuring its continued prosperity. She worked tirelessly to restore the realm to its former glory, and her people flourished once again under her guidance.

But despite their victory, the Fae remained vigilant, knowing that the forces of darkness could never be truly defeated. They continued to defend their realm from any threats that might arise, and the Realm of the Fae remained a shining beacon of light in a world filled with magic and wonder.
Read rest of entry

Monday, March 12, 2012

Rift Dungeons - Iron Tombs

Empowered by Regulos, Alsbeth is perhaps Telara’s most powerful sorceress, but even she has yet to break the will of Eliam. His spirit alone has withstood her magic, so she has recruited Ragnoth, a Fire demon adept at enslaving souls. For all this, Eliam’s ghost calls Ascended to Iron Tomb, warning all who will listen that the fate of Telara may be decided in his crypt under Freemarch.

The Endless have not come to Iron Tomb simply because they can’t abide a dignified death, or even for an army of enthralled heroes. The March Wardens were buried where the righteous might of their ghosts could protect an ancient secret. Tales say that deep below Iron Tomb itself lie mossy caves, lit by the hideous glow of an artifact that could bring victory to the Endless Court, and ruin to all Telara.

Iron Tombs

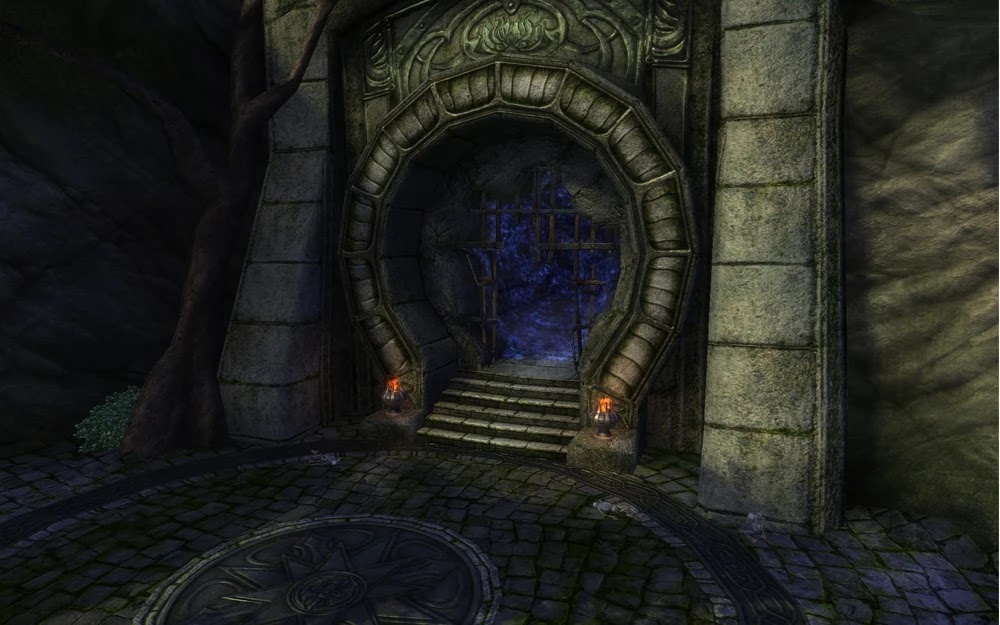
Iron Tombs is located in the Defiant starting area of Freemarch. This dungeon is meant for levels 19+. There are a total of five quests for this zone, all of them are given inside. The first quest is the standard automatic quest you receive for entering which is also automatic. There are two more additional quest given by Eliam’s Ghost at the entrance. Two other quests are given deeper in the dungeon by Tobias Leighton and Davian Crow.

Quest Information
Release the March Wardens
Quest Giver: Automatic
Location: Dungeon Entrance
Objective: Defeat all boss mobs in Iron Tombs; Caor Ashstone, The Three Kings, Ragnoth the Despoiler


The souls of ancient March Wardens have been corrupted by the Endless Court. Release them from their torment and then destroy Ragnoth the Despoiler so he does not reimprison them.


Relics of the March Warden
Quest Giver: Eliam’s Ghost
Location: Dungeon Entrance
Objective: Collect Staff of Derribec, Horn of Humbart, Targe of Laric. All obtained from the Three Kings boss event.


The March Wardens were buried with items of power they used in life and are now a part of the ritual that binds them to the Endless Court. Though they still carry them, it is as if they are carrying their own leashes. We need those back as well in order to free them.


Source of the Control
Quest Giver: Eliam’s Ghost
Location: Dungeon Entrance
Objective: Find the Sourcestone Amulets (see map above)


Yes, that villain Alsbeth, pawn of Regulos, is here, and she has corrupted many of the other March Wardens as her thralls. They are a powerful weapon in her hands. She has taken powerful sourcestone amulets they were buried with and corrupted them. As long as they are in her possession, the March Wardens are under her control.

If we could get them back, we could break her hold. Get them out of here and take them back to Sanctum where they will be safe.

You Are Who They Call
Quest Giver: Davian Crow
Location: See Map Above
Objective: Drag Spectral Screamers into Spectral Traps (See map above)


Alsbeth has corrupted three of Freemarch’s greatest kings. Those kings are a part of a spectral lock, used to contain foul spirits that once plagued our kingdom. Destroying these ancient monarchs will break the lock and release that horror once more. Yet, we cannot let Alsbeth maintain her hold over these fallen lords, so I must ask a great service of you.

After defeating the three kings, prevent the spirits from escaping by sealing them back in their eternal prison.

Laid to Rest
Quest Giver: Tobias Leighton
Location: See Map Above
Objective: Destroy the Death Shards


Alsbeth seeks to corrupt all the undead within the Iron Tomb for Regulos’ army. She’s place Death Shards throughout the tomb that twist our will.
I can reveal the spirits which feed these dark altars, but I need a hero to destroy Alsbeth’s creations.

Iron Tombs: Undead Dungeon Crawl
Iron Tombs is a pretty short instance since it contains only three bosses however it will be time consuming due to a lot of trash packs. It is a pretty standard dungeon crawl, there are no tricks, and it’s impossible to get lost. Being a level 19 dungeon you can almost bring any group configuration, even a Mage Healer, a Chloromancer. Rogues and Clerics can also tank this instance if everyone works well together.

The first thing you should do upon entering the instance is pick up two quests from Eliam’s Ghost. You can’t miss the quest giver since you’ll watch him talk to Alsbeth. Once that’s done it’s only a short walk to the first boss. Clear through a few packs of trash and you’ll come to a large open area. There is a ramp along the wall to your right. Walk up and you’ll have a few packs of ghosts to clear. Watch your pulls as the first boss, Caor Ashstone, wanders a short path around the center of this balcony. Clear a good space and get ready to engage the first boss.

Caor Ashstone
Caor Ashstone is a pretty simple boss, but can become healing intensive. He casts a quick ticking dot called Ashstone’s Curse that does low damage and he also puts the an effect called Jagged Wounds on the tank. This caveat is that this effect can stack and if it builds up it will wipe the group. Keep those heals on the target, and burn down the boss.


Once you are finished you want to continue west along the balcony and down another ramp. Once you come down the ramp you’ll have the option of clearing more trash to your right to get to Davian Crow who gives you the quest “You Are Who They Call” which you can complete after defeating the second boss encounter. It will offer you extra experience and a green necklace. In any case, you will continue forward and make a left up some stairs. If you’re careful you can skip at least one pack of trash mobs here.

Once you go up and then down the other side you’ll trigger the second boss event called the Three Kings. At first you’ll see Alsbeth begin speaking as she summons the Three Kings. Don’t worry about setting off the event, it will only start once you get close to Humbart, who is a decent distance away.


The Three Kings
The Three Kings consists of three bosses; Humbart the Bold, Laric the Ascendant and Derribec the Magus. Each one has a special ability that you have to pay attention too. Humbart has a frontal cleave called Deathly Whirlwind and a Knockback ability. You can tank him with your back against his statue. Derribec has a Life Rend which is a single target nuke. Laric has a heal spell called Unholy Mending which should be interrupted if possible.

The fight starts off with only Humbart. Once he’s dead Derribec appears on the right, and once dead, Laric appears on the left. If you are having a tough time, or are underleveled, you can always reset after each boss goes down. They will not aggro automatically. After all three are dead, they all respawn at the same time and attack you. The kill order should be Laric, Derribec and then Humbart.

Once all three are dead, a treasure chest appears with loot.


If you had picked up the quest from Davian Crow you will notice a large light glowing at the base of the platform the bosses spawned on. This is the Spectral Lure that you will use for the quest “You Are Who They Call“. Once you the Three Kings are defeated Spectral Screamers would of spawned all around you. Simply run over to them, click on the object you received for this quest, and run back to the lure. Do this ten times and that’s it.


Once you are finished it’s time to continue on. So far it’s been a quick journey to the second boss, but now comes a few long hallways of trash mobs, and hard hitting ones at that. Head north into the hallway and once through the door you’ll notice the last quest giver, Tobias Leighton, on your right. Pick up his quest as you’ll be passing by the three Death Shards on your way.

Continue up the stairs and at the top you’ll see two new mobs. These guys hit hard and cleave, so be very careful about your positioning. In the room at the top of the stairs you’ll see the first of three Death Shards, they are fairly obvious looking.

The Death Shard needs to be destroyed and in order to do so you have to kill three mobs that are protecting it. They are easily seen because they are the ones with giant lights beams coming out of their hands attached to the shard. Once they are dead you are free to destroy the Death Shard, however, make sure you clear a large space around it since the shard will summon many Putrid Ravagers. Go at a slow pace so you don’t get overwhelmed.


Continue through the hallway clearing trash. Once you turn the corner and start heading south again you’ll see the second Death Shard. Defeat that and continue on. At the end of the hallway you’ll see Alsbeth again, don’t worry she won’t attack you, she’ll run through a script and disappear, taunting you.

This next room is quite interesting. If you look down you’ll see dozens of black shade like mobs roaming around. Directly below you on the balcony is another room. In this room are the Sourcestone Amulets for the quest.


Head down the either side, it doesn’t matter, and come head out into the floor. You’ll notice there are orbs on pedestals spread out. These things will help you clear out all of the trash. If one person stands close by to them they will light up and do AOE damage to all of the shades around it. So keep your group moving from orb to orb clearing out all the mobs. One thing to consider, these mobs will continuously respawn until they are all dead, so move fast. 

Once you get to the middle of the area, turn north-east and you’ll see a small room. Head in and in the back of it you’ll notice a small chest on the floor. It’s hard to see and most people will likely miss it. Open it up and loot your Sourcestone Amulets to complete the quest.


Turn around and head south-west into another room. You’ll see two exits, one to the south and the west. Both go to the same spot, but the one to the west contains the last Death Shard. Head up, defeat the Shard and continue up the stair until you see the final boss.

Ragnoth the Despoiler

This is the last boss of the instance and it’s not a spank and tank. It requires movement of everyone in the group. Ragnoth has three attacks; Gout of Flame, which is a single target DD spell, Chaotic Flame which is a PBAOE (frontal cleave) spell, and lastly Flame of Ragnoth. If you get hit with Flame of Ragnoth, you will most likely wipe. It’s an AOE attack spell that applies a DOT to everyone that is nearly impossible to heal through unless you are over geared for the instance. However there is a way to avoid it.


At the start of the fight he is facing an altar. The tank should head in and grab aggro and manuever Ragnoth to face away from the party so the cleave doesn’t hit anyone else. At this point it’s a simple tank and spank. As we have mentioned though, Ragnoth will periodically cast Flame of Ragnoth. Fortunately for us, Eliam’s Ghost is here to save us.

Be very aware of your surroundings. As Ragnoth begins his cast, Eliam’s Ghost will arrive at one of a few random location near the decorative idols periodically surrounding the dais. Run into the light and you will not be affected by the Flame. However Ragnoth will follow you over so the tank must be careful to back up and not turn around so he or she does not gain exposure.

Repeat this cycle and you will win your loot and the dungeon. Once he’s death Eliam’s Ghost will appear and open a portal out of the dungeon for you.


Iron Tombs Dungeon Guide Video
Read rest of entry

Monday, April 11, 2011

Guide to the Iron Tomb

Quick primer for the game's first instance.


Found in the starting zone of Freemarch, Iron Tombs is the first instance Defiant players will encounter. Tuned for players of level 17 and higher (many will prefer to wait until level 19) , this is a pretty standard dungeon crawl with three boss encounters and plenty of undead minions lying in wait. Iron Tombs is steeped in lore as players attempt to foil the plans to the Endless Court who seek to aid Regulos in destroying Telara.


Group Configuration:

A single tank and healer are sufficient to build a group around, leaving room for your choice of DPS to fill out the party with any healing soul being a viable option – including the Chloromancer.

Quests:

There are five total quests available for Iron Tombs, none of them need to be picked up beforehand as they are all given inside the instance:

  • Release the March Wardens: the first quest you will encounter and it is given automatically upon your initial zone in. This straightforward quest tasks you with vanquishing all three boss encounters
  • Relics of the March Warden: is given by the NPC Eliam’s Ghost at the zone in and it requires you to loot three items from the second boss encounter.
  • Source of Control: is also dispensed by Eliam’s Ghost and it sends players into the zone to retrieve Sourcestone Amulets.
  • You Are Who They Call: is given after defeating the second boss encounter, players will be given a clickable item that they will use to drag Spectral Screamers back to a central location
  • Laid to Rest: obtained from the NPC Tobias Leighton inside the zone and the objective is to destroy several Death Shards throughout the zone.


Damaging the Death Shards will begin to release waves of mobs, so be careful to dispatch each wave before resuming dps on the shards. Releasing too many waves is an easy way to wipe your group

Bosses:

Caor Ashtone
This encounter is the easiest of the three and is a standard tank and spank with a DPS race component. Once the tank establishes initial agro, DPS can open up on him as there are no tricky mechanics in place to prevent the tank from holding threat. Caor doesn’t hit the tank too hard with melee, but he uses a fast DoT named Ashtone’s Curse to create a stacking debuff on the tank that will make them unhealable if the fight goes on too long. This debuff is called Jagged Wounds and is not dispellable, so make sure to keep big heals coming as it builds and keep DPS on task to prevent a wipe.

Three Kings Event
The second encounter is a council style event known as the Three Kings. The event begins with a scripted animation showing Alsbeth summoning the bosses Humbart the Bold, Laric the Ascendant and Derribec the Magus. The event starts off with each boss attacking after the one before it is killed, beginning with Humbart. Humbart is the easiest of the three and should be tanked facing away from the group as he has a nasty frontal cleave that also knocks back effected players.

His statue can be used as a barrier if the tank keeps their back to it, giving the rest of the party plenty of room to attack.


Once Humbart falls, Derribec becomes active and will begin nuking the tank hard with his Life Rend spell. The good news here is that it is only a single target ability, but it does hit hard. Laric engages once Derribec is dispatched and uses a fast cast heal ability to frustrate opponents. Keeping the heal interrupted will help make quick work of Derribec and then the real fun begins. Phase two consists of all three kings resurrecting at once and engaging the group. The tank will want to save any AoE threat cooldowns for the start of this phase. The kill order for this phase will be the reverse of phase 1 as Laric should be your initial target. Focus fire each boss down and be mindful of interrupting Laric’s heal. Once the triumvirate have been finally laid to rest a treasure chest will appear for you to loot.

The Orb Room:
While this isn’t a boss encounter, the orb room is a gauntlet style encounter that requires a moderate amount of coordination and haste to complete. This room may look overwhelming at first due to the large amount of mobs, but interspersed throughout the room are clickable orbs that will help kill any npcs in their area. The trick here is that these mobs will continually respawn unless they are all killed before the respawn timer hits. Our group found success by sending the tank ahead to the next orb with the healer staying in between as the dps burned down the remaining mobs. Completing this gauntlet will allow you to access the area that contains the Sourcestone Amulet for the Source of Control quest.

Ragnoth the Despoiler:
The final boss encounter in Iron Tombs, Ragnoth the Despoiler is also the most fun. This scripted fight is aided by an NPC who helps to negate Ragnoth’s most devastating attack – Flame of Ragnoth. The fight starts out fairly straightforward as the tank will engage and spin the boss away from the group to avoid his frontal cleave. Healing can get a bit dicey with the cleave and a direct nuke, but the party shouldn’t take any damage here so focus on the tank. Periodically throughout the fight Ragnoth will being to channel the flame spell and you will notice just before this happens that Eliam’s Ghost will appear and also cast a shield, all players will need to run into this shield to avoid death. Ragnoth does follow the tank over, so be mindful of positioning to keep the party safe from his other attacks. The fight continues to repeat these two phases until Ragnoth is put into the ground. In addition to saving your bacon, Eliam’s Ghost is kind enough to stick around and open up a portal to whisk you out of the dungeon.

Iron Tombs is a nice introduction to Rift instanced zones and helps to reinforce the lore of Telara nicely. Even though there are only three boss encounters, you will want to block out a decent amount of time due to density and overall amount of trash mobs throughout the zone.
Read rest of entry

Friday, February 18, 2011

Runic Descent bosses


Instance in RIFT named Runic Descent located in Moonshade.


I know most people have lives, and won't see this content in the beta. I'll get a Fall of Lantern Hook video up soon as I find a group lol.


Runic Descent Achievements

PointsTitleDescription
30Conqueror: Runic DescentComplete All of the Runic Descent Achievements Listed Below.
10Runic DescentDefeat all of the bosses in Runic Descent.
15Expert: Runic DescentDefeat the bosses of Runic Descent on Expert difficulty level.
15Rapid Assault: Runic DescentDefeat all Runic Descent Bosses on Expert Difficulty within 40 minutes of first combat.
15Achiever: Runic DescentComplete all Runic Descent achievements listed below.
10Keep CleaningDefeat Rictus without any party member taking every tick of damage of Rotting Flesh on Expert difficulty.
10Blossom BombsDefeat Wormwood without any party member taking any damage from a Rotting Blossom on Expert difficulty.
10RestraintDefeat Warden Falidor without any party member damaging the boss while his Glacial Shield is active on Expert difficulty.
10Mourning SongDefeat Atrophinius the Fallen without killing any Eternal Lackeys on Expert difficulty.
10Blinding LightDefeat Eliam the Corrupted without any player becoming affected by Blinding Darkness on Expert difficulty.
10Avoiding Death's GraspDefeat Eliam the Corrupted without any player being affected by Torment on Expert difficulty.
Read rest of entry
 

Star Wars Gaming news

RIFT: News and guides © 2009